MOSAIC Reference Guide
What is MOSAIC ?
MOSAIC is a 3Ds Max material to create mosaic patterns based on multiple bitmaps. MOSAIC can load hundreds of bitmaps with the autoloader function and match these bitmaps to the colors of a source map. MOSAIC places the bitmaps according to the average color of each bitmap to the best matched color of the source map. You can choose different bond patterns, mix with the original colors and add more images on the fly until you get the desired mosaic result.
What are the differences between Mosaic, Walls & Tiles and Crossmap ?
Please view the separate feature comparison chart for more details on what unique to each product.
MOSAIC 1.1.0 – User Interface and parameters
Header / Preferences / Online Help
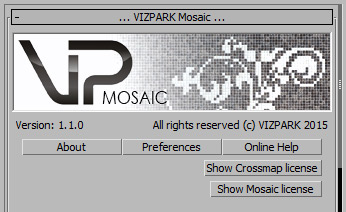
About
The about screen contains information about the version (in case you need support, please provide this version number), the developers and a link to the CHANGELOG.
Online Help
This dialog contains links to documentation, tutorials and more textures for Mosaic or Crossmap.
Show License / Activate Mosaic
If you´re using Mosaic in 14 day demo mode, the demo notification will appear, showing how many days are left of the demo period. Once the demo period is over, you have to activate Mosaic and Crossmap with a valid serial number.

Mosaic Preferences
In this preferences window you can define the filter settings which the auto-loader should use to filter and assign multitexture-bitmaps to the layers bump, reflection, diffuse, displacement, alpha and normal while loading. If you use “*” as string, the filter will load all bitmaps, if you use “diff” it will load all bitmaps with diff in their names. Currently you can auto-load the bitmap-formats .jpg / .png / .gif / .bmp / .tga / .tif .
Default Library Path
This default path will be the path that is pre-selected in the load bitmaps dialog window. Once selected and stored it remains stored until you change it again.
Check for software update
When selected, this will check for an update online when a new Mosaic material is created. Turning it off will not do this check, but you can manually check with the Check Now button.
Mosaic Library and Material Manager

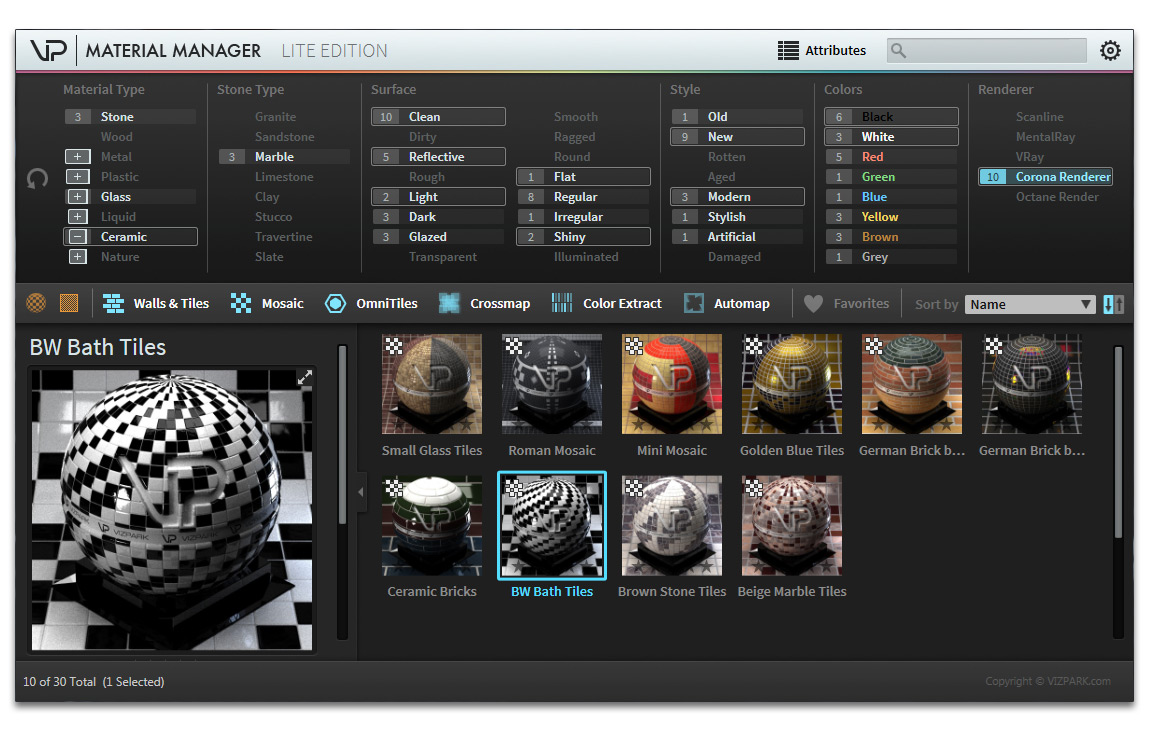
(New in v1.1)
Load Preset
Load Preset will open the Material Manager in MOSAIC MATERIAL MODE. This means, only Mosaic material presets will be shown. Double click or LOAD on the bottom right corner will load the preset and it´s bitmaps.
Save Preset
Save Preset will save a Mosaic material preset into the Material Manager. The included bitmaps are also saved, as well as a map thumbnail (600 x 600 pixel) that will be rendered during this process.After saving the files and rendering the thumbnail, Material Manager will open, so you can define attributes for the preset.
Open Manager
Open Manager will open Material Manager in general mode that shows ALL available presets stored in Material Manager and it´s database.
Further information about Material Manager can be found in the Material Manager Documentation:
Mosaic Source

Source Map
The source map is the source on which the bitmaps are distributed according to their own average color and the colors of the source map. If you have a black/white source map and your bitmaps are black and white (or light/dark grey) the dark bitmaps are placed at the black areas of the source map and the light bitmaps are placed to the white areas of the source map. The source map can be a BITMAP or PROCEDURAL MAP from within 3ds max. As procedural maps in 3ds max are quite different (from the technical backside), not all of the maps works properly with Mosaic. An error message will appear, telling you that the loaded map will not work properly. You can still use the map, but will not be able to use all of the source map settings.
IMPORTANT INFO: When loading the source map, the coordinates settings are automatically set to 0.01 tiling and 50% shift for x and y. This is intended and should not be changed unless you know what you do. If you don´t use this main map button, please make sure that you set these values correctly manually.
Shift X/Y
These parameters will shift the source map in x and y direction.
Values range from -100 to +100.
Scale X/Y
These parameters will scale the source map up (larger) or down (smaller).
Mosaic Source - Distribution

In this area you can define how the source map affects the bitmap to color matching.
Random Spread
When you match bitmaps to the source map, Mosaic tries to match the bitmaps as closely as possible to the colors of the source map. This parameter randomizes this matching. The higher the value the further away bitmaps are placed from the original color. See examples below…
Values range from 0 (no random spread) to 100 (full randomization)
Match tiles by HSV or RGB
You can choose to match the bitmaps either based on HSV (Hue, Saturation, Value) values or based on RGB (Red, Green, Blue) values. Which mode works better, really depends on your source map and the average bitmaps / tiles colors.
Color Strength
This parameter sets the output color strength for a map and is especially intended for use with bitmaps. While some bitmaps can have weak / desaturated colors, you can adjust the intensity with this parameter to get a better matching to your bitmaps.
Values range from 0 to 1000
Source Brightness
This brightness parameter sets the output brightness for a map and is also especially intended for use with bitmaps. According to the above color strength parameter, the brightness can brighten up or darken the source bitmap.
Values range from -1000 to 1000
Random Spread 0

Random Spread 50

The above example shows black and white tiles distributed by a gradient source map, with a black-white linear gradient. In the first example with Random Spread 0 the placement is split strictly at the middle position where the source map is grey (on the border of black and white). In the second example, the placement is randomly varied by 50%.
Match tiles by HSV

Match tiles by RGB

These color match mode examples show the difference between HSV and RGB mode. Depending on your bitmaps and source map, you might need to try both modes to find the one that fits best for your situation.
Color Strength 20 / Bright. 125

Color Strength 100 / Bright. 100

In this example, the source map has been changed with brightness and color strength, resulting in a sort of limiter effect. These parameters can therefore be used to control the source image to more precisely match the tiles to colors. You´ll also notice that the black tiles are different, because the source color is different and therefore selects a different tile bitmap.
Color Invert OFF

Color Invert ON

The invert function can be used to quickly switch the color matching and map light to dark and dark to light colors. Depending on your source map and the bitmaps colors, it may be necessary to adjust the color settings or mode.
Define Bitmap to color matching

This dialog shows a complete list of all diffuse bitmaps, including their average colors, thumbails, sizes, RAM use and names.
Thumb
Shows a small thumbnail of each diffuse bitmap.
Preview
Opens a full preview of the diffuse bitmap.
Match color
This color for each tile / bitmap is automatically generated when bitmaps are loaded. The colors can be changed with the color picker and copied from one to another. With these colors, you can define how the bitmaps are matched to the source map colors. For example, you can change a green bitmap color to a red one, if you want to place the bitmap to a red area within your source map.
Size
Shows the pixel resolution of the diffuse bitmap.
RAM Use
Shows the approximated memory use of the diffuse bitmap in MegaByte.
Filename
Shows the filename of the loaded diffuse bitmap.
Mosaic Color-Mix

With these parameters, you can change the colors of the source map and how they affect the rendering when they are mixed with the bitmaps. These settings do NOT affect how the bitmaps / tiles are matched to the source map. These settings only affect how colors look like when added or mixed with the bitmaps.
Source Color Mix
This value will add mosaic colors to the bitmaps from no colors (0%) to only colors (100%) without bitmap diffuse colors. You can use the source colors in combination with the bitmaps or even without, if you only want to create a simple color mosaic with one source map. In this case, turn the value to 100%, so you get full colors.
Values range from 0% (no source colors used) to 100% (only source colors used)
Source Mosaic Hue
The source Mosaic Hue parameter changes the hue of the source colors (not bitmaps!), if they are mixed with the bitmaps. The parameter has no effect, if Source Color Mix value is set to 0%.
Values range from -100 to 100 for the full hue range.
Source Mosaic Saturation
The source Mosaic Saturation parameter changes the saturation of the source colors (not bitmaps!), if they are mixed with the bitmaps. The parameter has no effect, if Source Color Mix value is set to 0%.
Values range from -100 (desaturated) to 100 (full saturation).
Source Mosaic Contrast
The source Mosaic Contrast parameter can be used to get additional color contrast of the source colors (not bitmaps!), if they are mixed with the bitmaps. The parameter has no effect, if Source Color Mix value is set to 0%.
Values range from -100 (no contrast) to 100 (added contrast).
Source Color Mix 0%

Source Color Mix 100%

Source Hue -80 / Sat -30

Source Sat -100 / Contrast +50

Bitmap Auto-Loader

Select Folder
This button will open up a dialog to select a folder containing bitmaps. Depending on the filter preferences (see above), the bitmaps will be loaded and automatically assigned to the corresponding layers for bump, reflection, displace, diffuse, normal and alpha. The process bar below shows the loading process and shows a full white bar, if bitmaps are loaded.
Append Bitmaps
If this button is checked, bitmaps are added to the existing bitmaps. If Append bitmaps is unchecked, the existing bitmaps are cleared and the new bitmaps are loaded instead.
Clear
With this function you can clear all bitmaps empty the layers, except for the source map, which stays untouched.
Loaded Bitmaps:
The layers Diffuse, Bump, Reflection, Displace, Alpha and Normal show the current number of loaded bitmaps per layer. The Normal bitmaps are used for the bump channel either alone or in combination with the bump bitmaps. The Alpha bitmaps are used to separate the mortar from the brick to edit the mortar contrast and brightness independent from the bricks.
Brick / Tile size

Brick size X/Y
Here you can define the brick size directly in width and height.
Number of rows
This value controls the overall resolution of the wall or floor pattern by setting the vertical number of rows. 10 means that the uv-map will contain 10 rows of the bricks or tiles.
Aspect Ratio
Here you can define the aspect ratio for the tiles. It also updates the aspect ratio when defining the Brick sizes. A value of 1.0 means a perfect square, a value of 2.0 means X is 2 times the size of Y. 0.5 means X is half size of Y.
Automatic Ratio
The Automatic Ratio button is very helpful when you don´t know the exact ratio of your tile bitmaps. If turned on, the ratio will be automatically calculated based on the width and height of all diffuse bitmaps. When bitmaps have different aspect ratios, the average of all diffuse maps will be calculated. You can turn this function off by changing the ratio parameter to a different value than the auto-ratio value.
Mosaic Bond Patterns

Bond Patterns
The following table shows 16 different bond patterns for mosaic walls or floors of different kind. The patterns include:
Herringbone

Stack Bond

Stretcher Bond

Stretcher Bond 2/3

Stretcher Bond 3/3

Stretcher Bond 2/4

Stretcher Bond 4/4

Flemish Stretcher Bond

Common Bond

Flemish Bond

Monk Bond

Flemish Garden Wall Bond

English Bond

English Cross Bond

Double English Cross Bond

Rap Trap Bond

Edges / Mortar

Crop original Edges
This parameter will cut off the edges of each tile from 0% to 100%. When cropping the edges, the bitmap in each tile will be automatically scaled to fit the bond pattern. Width (X) and height (Y) of the edges can be cropped independently (New in v1.2).
Soften Edges
The Soften Edges parameter will add soft-edges to each brick / tile. The edges between the tiles will have the color set below.
Procedural Edges
This parameter adds procedural edges to the tiles with the color set below. Width (X) and height (Y) of the procedural edges can be changed independently. (New in v1.2)
Procedural Edge Map (New in v1.2)
If a map is loaded, the color has no influence and the edges / mortar is defined by the map alone. If not map is used, the color defines the color of the procedural edges.
Original Mortar Brightness
This parameter changes the brightness of the mortar between the bricks. It is ONLY available when Alpha maps are loaded that separate the mortar from the bricks.
Original Mortar Contrast
This parameter changes the contrast of the mortar between the bricks. It is ONLY available when Alpha maps are loaded that separate the mortar from the bricks.
Original Mortar Amount (New in v1.2)
With this value you can blend between the original mortar from the diffuse bitmaps and the procedural mortar (either as the mortar color or a map if used). The value range is from 0-100 while 0 means procedural mortar only and 100 means original mortar only. It is ONLY available when Alpha maps are loaded that separate the mortar from the bricks.
Positioning

Global Random Seed
Setting a new random seed will randomize the bitmap distribution and other randomization settings.
Random Size
Random size will randomly scale the each bitmap / tile up, but not down.
Random Rotation
Random rotation will rotate each tile randomly.
Random Stretch-X
This parameter will randomly stretch and squeeze each tile horizontally. Settings this parameter to 50 or higher will result in a nice random tiles, good for cobblestones for example.
Random Stretch-Y
This parameter will randomly stretch and squeeze each row vertically.
Distortion
The Distortion parameter will distort the complete map based on a noise map. The value sets the distortion strength.
Distortion Size
The Distortion Size sets the size / granularity of the noise distortion. Lower values will distort with more fine detail, higher values will distort the map on a larger scale.
Random Mirror
This parameter will randomly mirror each tile by the X-axis and/or Y-axis. Diagonal mirroring will rotate a tile by 90° (diagonal mirror) but will disable the random rotation parameter. (New in v1.1)
Random Size

Random Rotation

Random Stretch-X

Random Stretch-Y

Random Distortion

Random Mirror X/Y

Surface Randomization

Random Bump
Random bump will vary the bump amounts for each tile by the value from 0% to 100%.
Random Displacement
Random displacement will vary the displacement amounts for each tile by the value from 0% to 100%.
Random Reflection
Random reflection will vary the reflection amounts for each tile by the value from 0% to 100%.
Color Randomization

Random Hue
Random hue will vary the hue amounts for each tile by the value from 0% to 100%.
Random Saturation
Random saturation will vary the saturation amounts for each tile by the value from 0% to 100%.
Random Value
Random value will vary the dark-light values for each tile by the value from 0% to 100%.
No Color Variation

Random Hue

Random Saturation

Random Value

Color Correction (Tiles only)
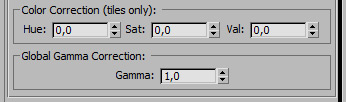
Color Correction (Tiles only) (added in v1.1)
These parameters hue, sat, val will change the tiles only, without affecting the mortar or edges (only if alpha maps are loaded).
Global Gamma Correction
The Gamma parameter adjusts the output Gamma of the loaded bitmaps from 0.01 to 10. Depending on what your Input Gamma settings are in the Render Preferences, you might need to adjust the output gamma accordingly.
Compatibility
- Autodesk 3Ds Max 2020 (64 bit)
- Autodesk 3Ds Max 2019 (64 bit)
- Autodesk 3Ds Max 2018 (64 bit)
- Autodesk 3Ds Max 2017 (64 bit)
- Autodesk 3Ds Max 2016 (64 bit)
- Autodesk 3Ds Max 2015 (64 bit)
- Autodesk 3Ds Max 2014 (64 bit)
- Autodesk 3Ds Max 2013 (32 bit and 64 bit)
- Chaosgroup vray renderer
- Scanline renderer
- Corona Renderer 1.0
Installation and Activation
More information on Licensing and Activation
Installation is easy, just start the installer “Mosaic installer.exe” and select the install location and plugins you want to install. The installer automatically installs all plugins, demo files, preview images, Material Manager and documentation.
Go to the material editor, add a new material and select the “VP Mosaic” material from the list.
An activation screen will appear and you will be asked to enter your name, company, email and serial number that
you received from VIZPARK.