Tutorials
Correct corner displacement in vray with Walls & Tiles
This tutorial explains how to avoid “gaps” at the corners of walls when using displacement in vray. Even though this problem is a general problem and not caused by Walls & Tiles, it may appear more often, because Walls & Tiles uses displacement by default. The solution is not difficult and will help in general when using displacement on corners of objects. Walls & Tiles has a new feature since version 1.3.0 that simplifies the displacement settings explained below.
In vray there are two ways using displacement:
- With the vray material itself (by using a map within the displacement slot)
- With the vray displacement modifier
Both methods have their advantages and disadvantages, but the vray displacement modifier is the better solution when trying to close or avoid gaps on corners.
(1) Manual method
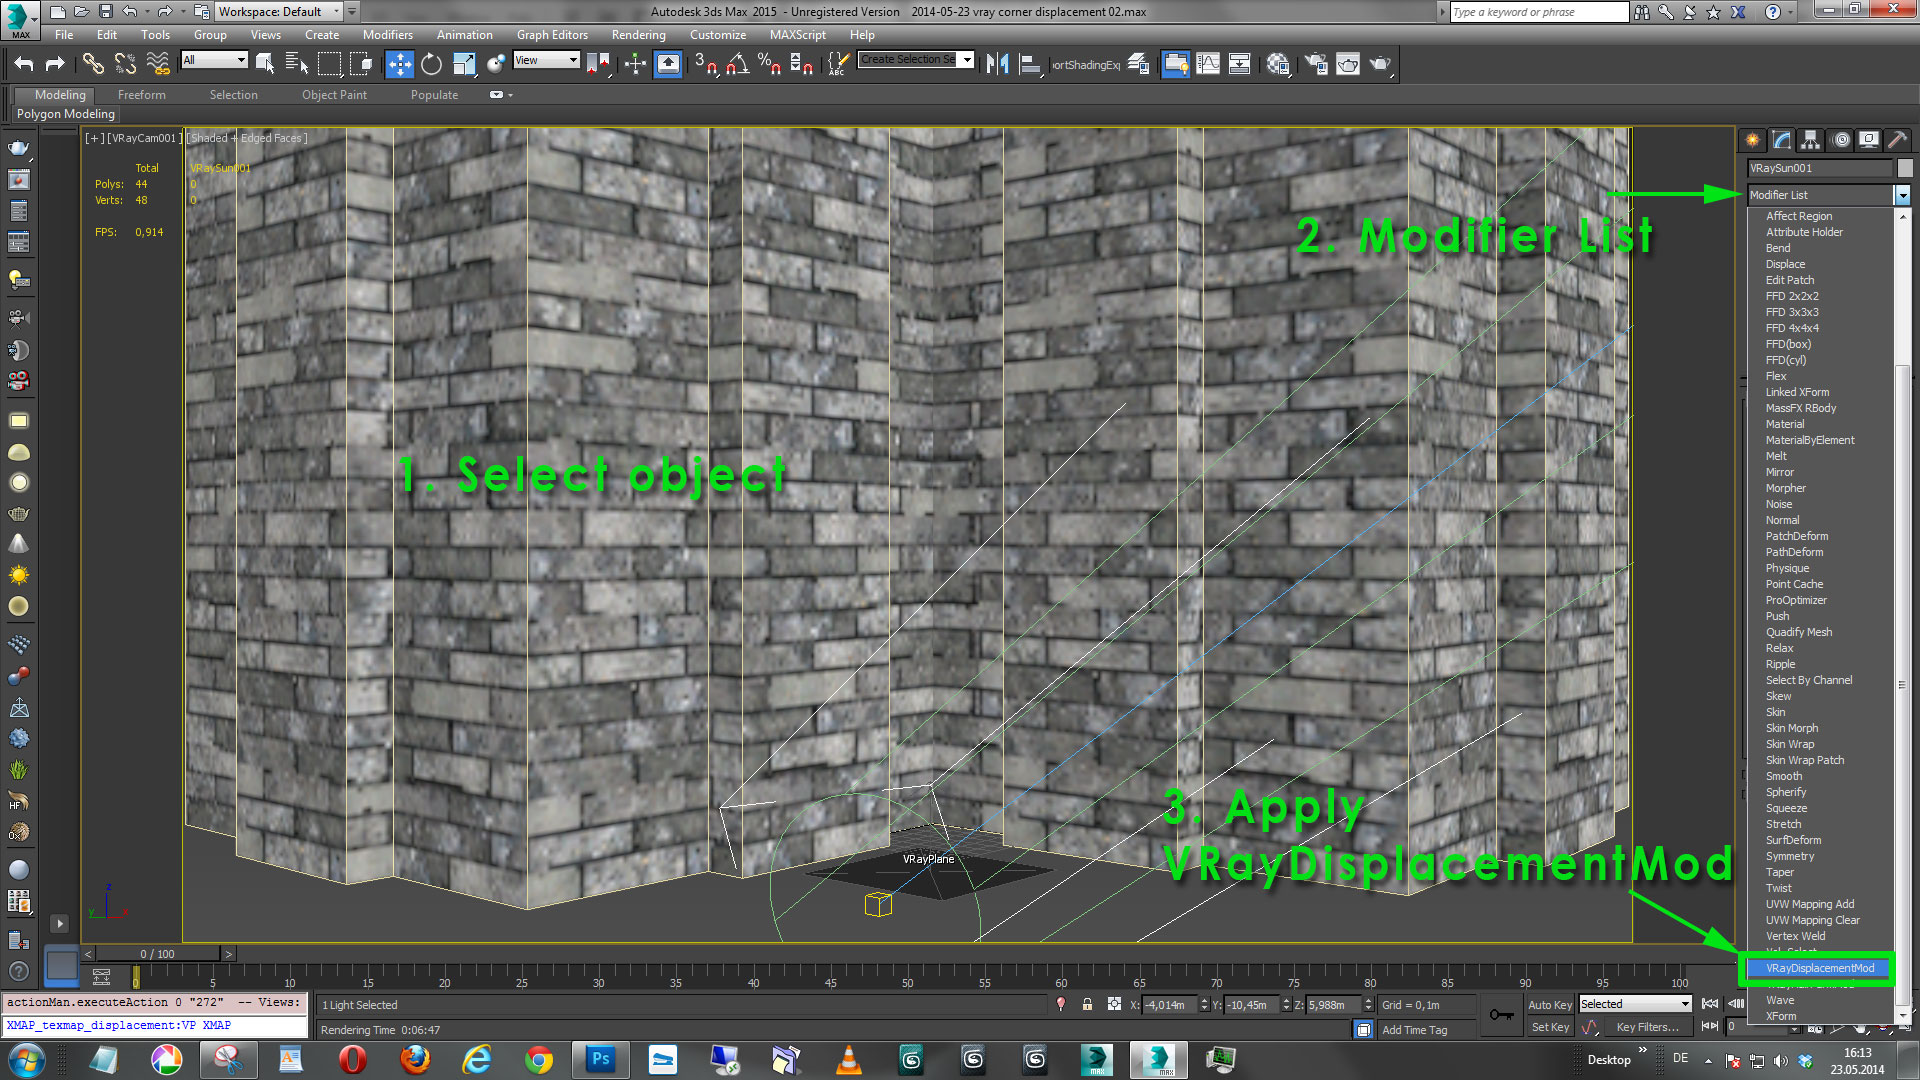
01 – Add the vray displacement modifier
When you have a problem with holes on the corners of objects with vray while using displacement, you need to apply the vray displacement modifier with correct settings. The VRAYDISPLACEMENTMOD can be found in the modifier list:
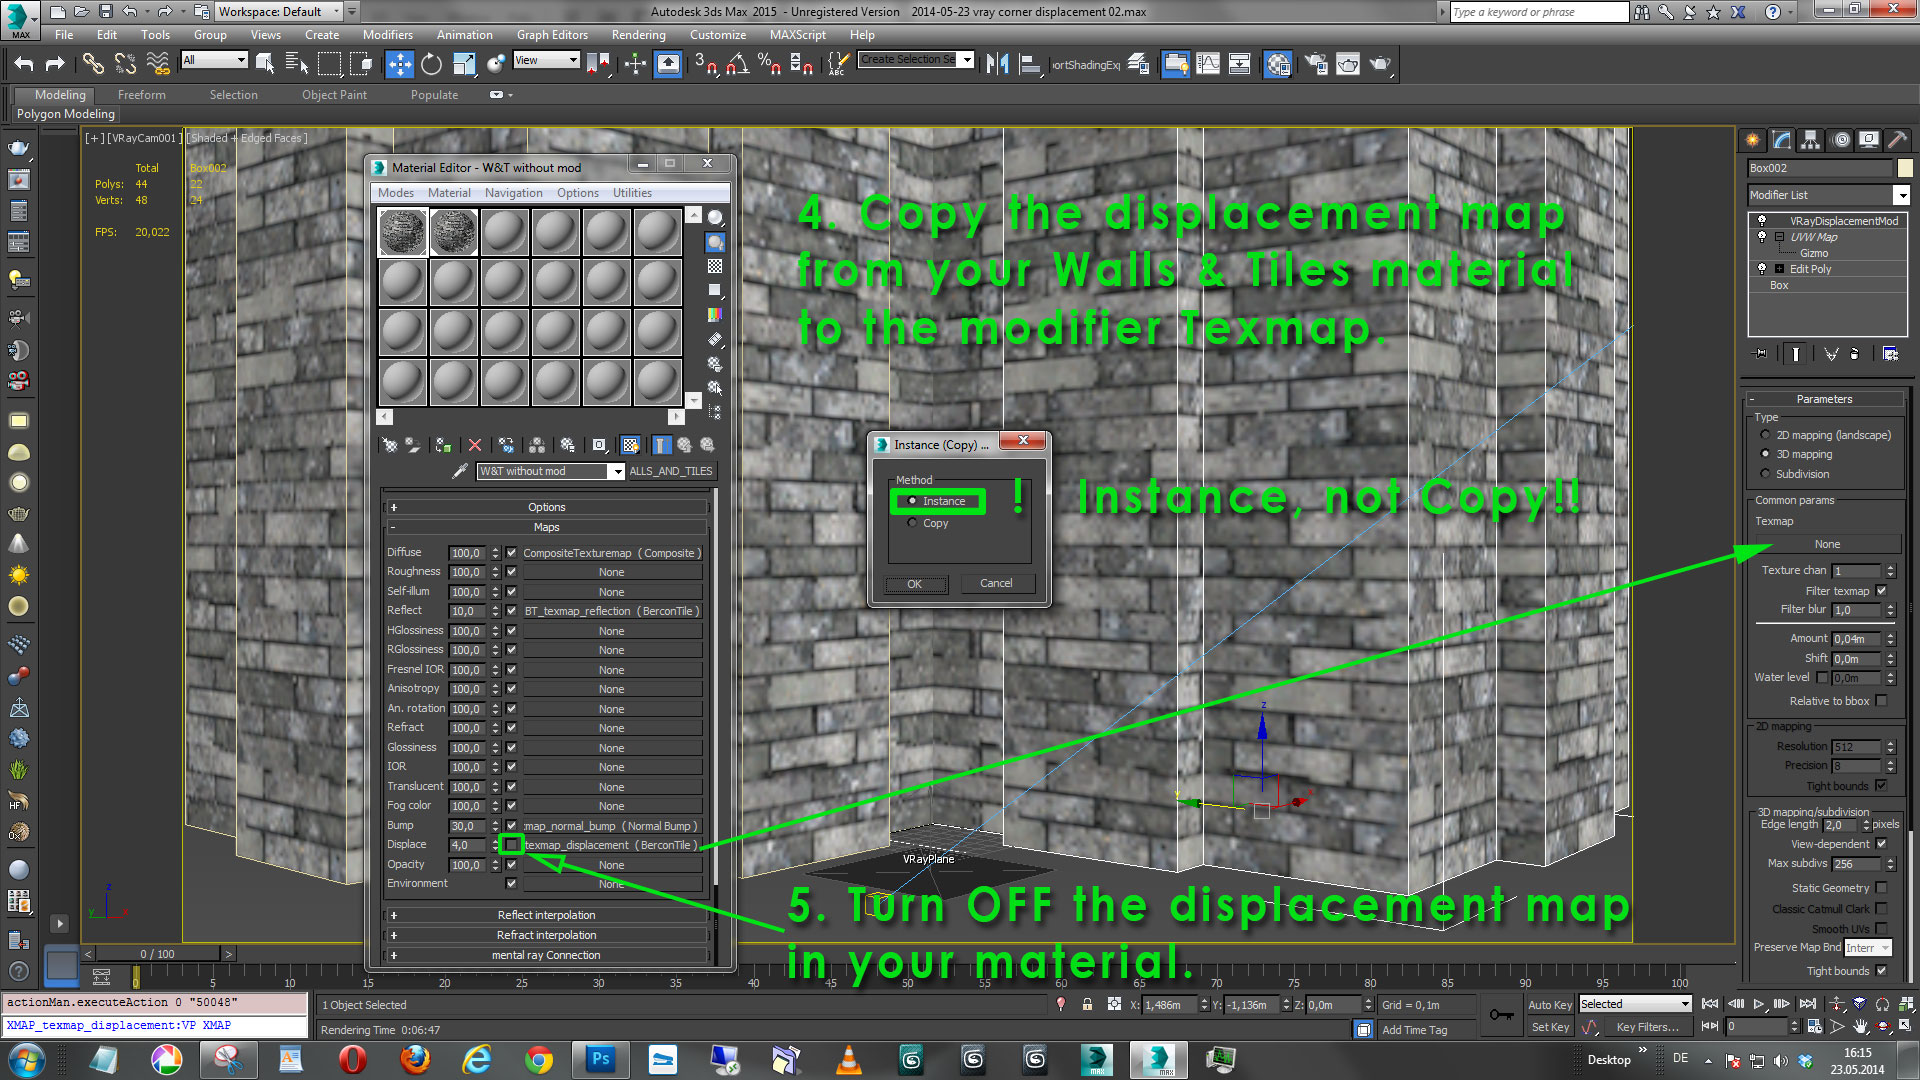
02 – Copy the displacement map from Walls & Tiles to your modifier texmap
Now you need to copy (instance!) the displacement map from your Walls & Tiles material to the texmap of your displacement modifier. If you create a copy of the map, the parameter changes from your Walls & Tiles material will not be adapted from the displacement modifier. That´s why it is important to create an INSTANCE when dragging the displacement map from the material to the texmap slot of the modifier. If you change settings in Walls & Tiles now, the displacement map will follow these settings.
After instancing the map, turn OFF the displacement layer in your material, so that only the modifier will displace your geometry.
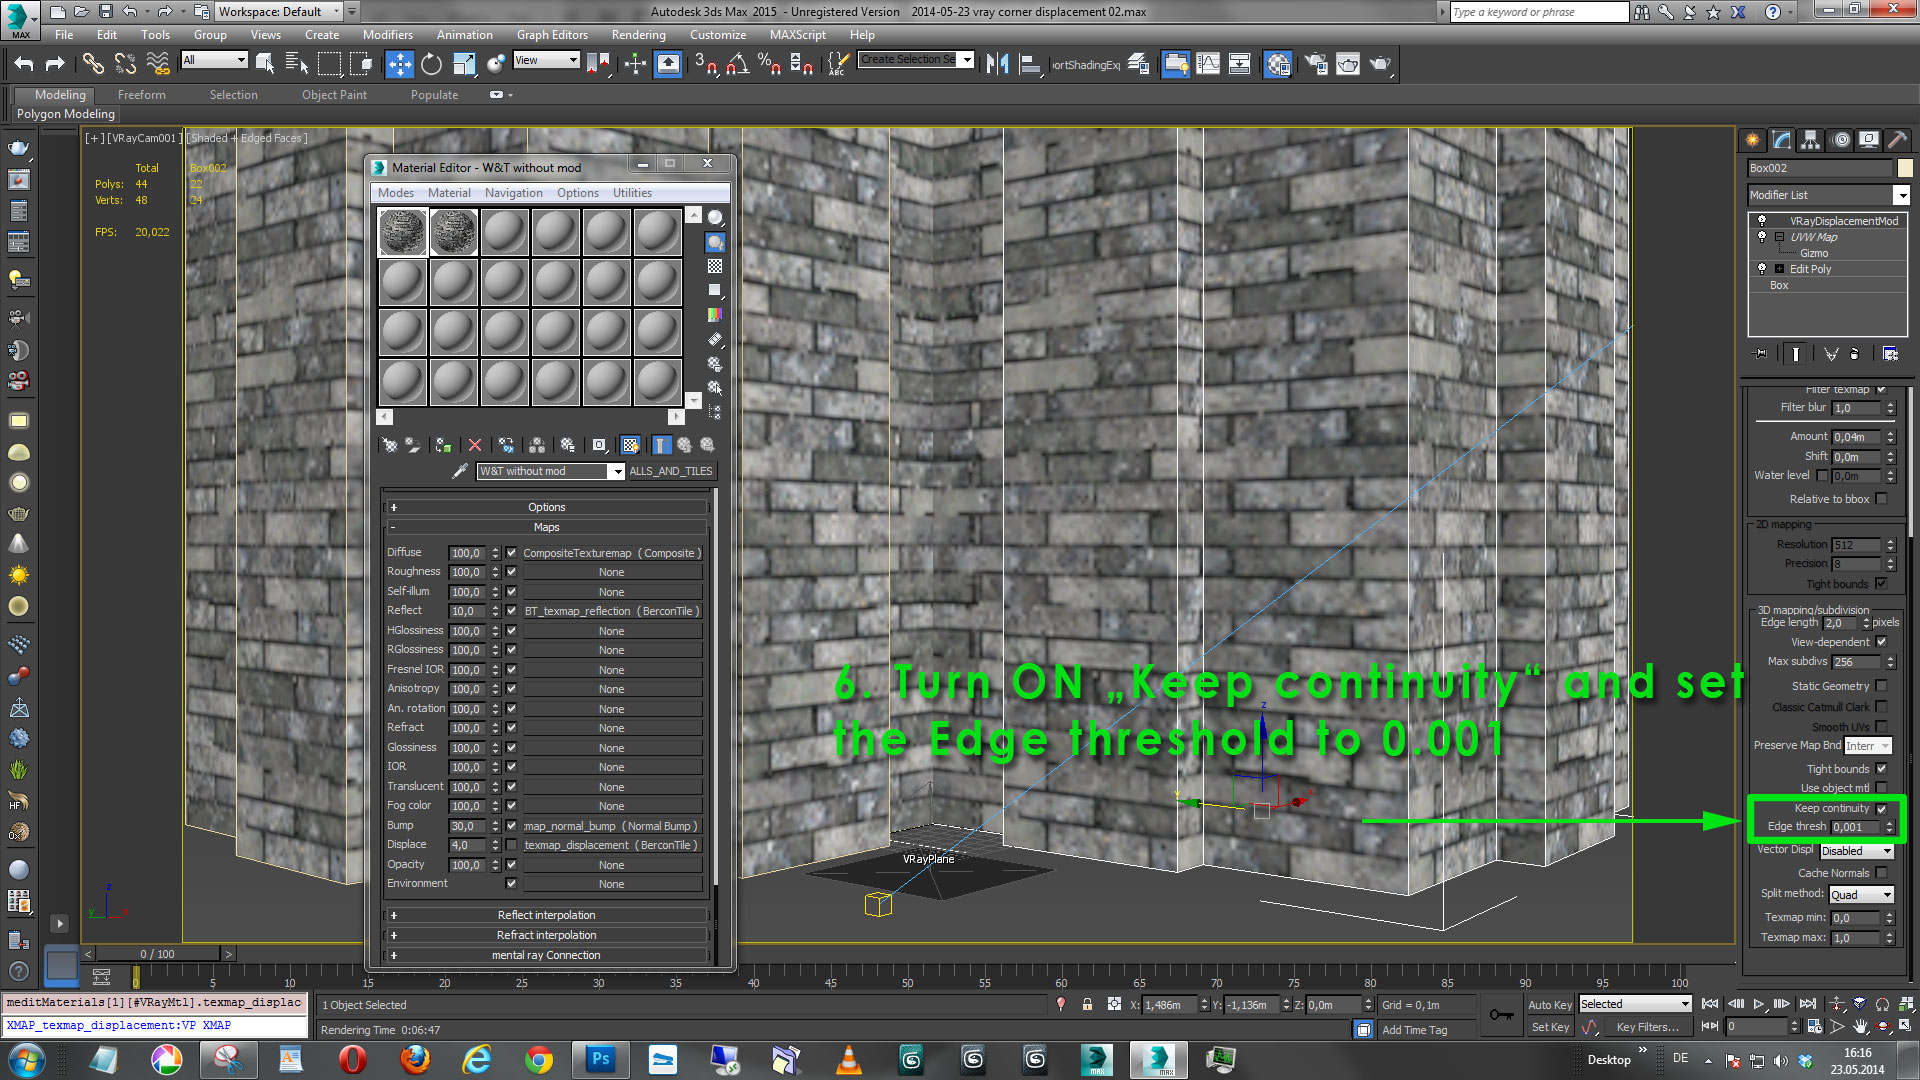
03 – Enable Keep Continuity and set threshold to 0.001
The third and last thing is to set the correct parameters in the displacement modifier. You need to enable the Keep Continuity feature and set the Edge Threshold to 0.001.
You still may have to adjust some settings so that you get the same result. For example the Amount parameter, which might need adjustment depending on your general displacement settings in the renderer preferences. It may also be necessary to adjust the EDGE LENGTH to a lower value, if you see artifacts in the displacement. Lowering the Edge Length to 3 or 2 will result in better displacement resolution, but also longer render times.
(2) Automatic method
Requires Walls & Tiles 1.3.0 or higher
For all of the above manual adjustments there is a simpler alternative, implemented in Walls & Tiles 1.3.0 (just the vray material version).
On the bottom of the Walls & Tiles material settings you´ll find a new part VRAY Displacement that has two buttons.
The first button selects all objects with the current material assigned to them. The second button adds a vray displacement modifier on all selected objects with this material assigned to them, sets all parameters accordingly, and disables the displacement layer inside of the material. If you use this feature, you still might need to adjust the Amount and Edge Length in the displacement modifier, as described above. But using this feature is much simpler and faster than using the manual method.


Thanks for the great tips!
Hi
thanks for your good tutorial. I have the same problem in another way. I have a box with 2 IDs 1st id is the front side of the box and 2nd one is another parts of the box in 1 id I assign vray material and in front, Id assigns vray blend material base material is the same as another part of the box and coat material is one logo in gold leaf material. for more realistic vary I give a displacement of the logo to front id base material, but the problem is when I render the front side completely separate from the box . and I don’t know how can I fix it with this tutorial.
?
pleas help me
thanks
Hi Sivalehco, you might want to try baking the displacement texture into one bitmap and use one ID. I´m not sure if v-ray really supports displacement over different material IDs.