Tutorials
How to create random square tiles on faces with Crossmap

Mar
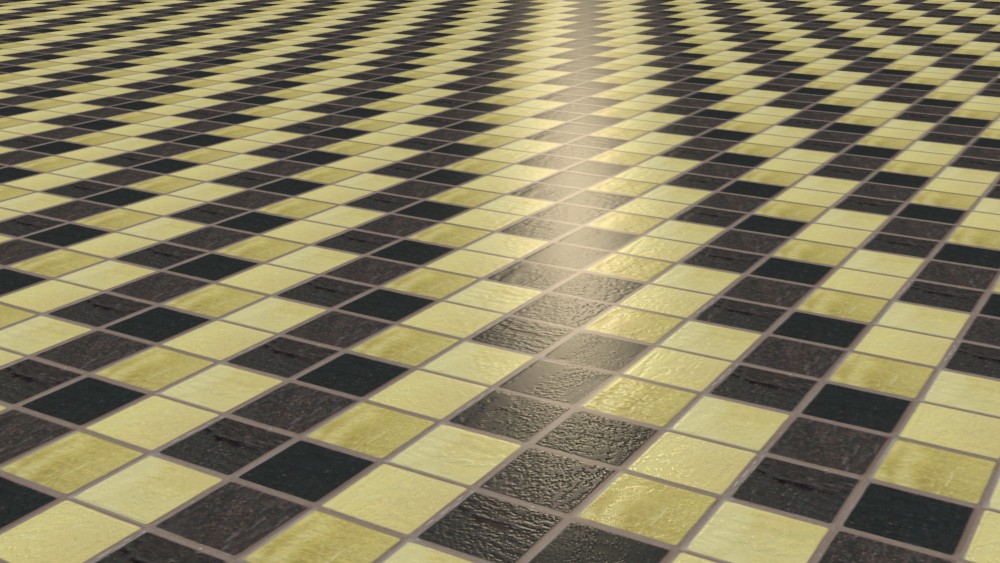
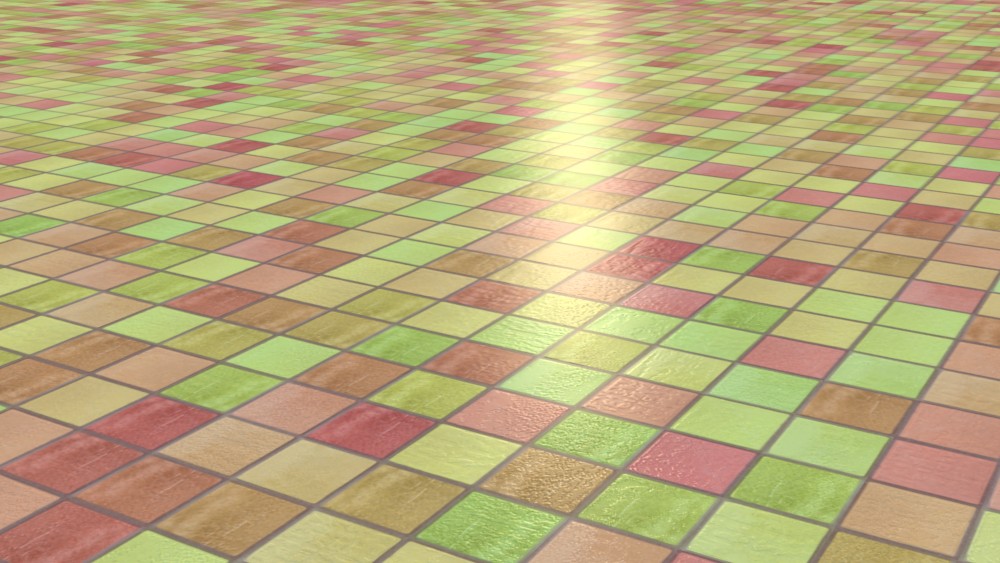
This tutorial shows how you can randomly distribute bitmaps on faces of objects with Crossmap. This is especially useful when creating stone floors or interior tiles for kitchens or bathrooms with just simple plane or box objects.
Crossmap is a texture-map plugin from VIZPARK which loads multiple bitmaps at once and distributes these images on objects, elements, of faces of objects. Especially this mode is quite easy to set up for random tiles in a regular square patterns.
(1) Create objects with square faces
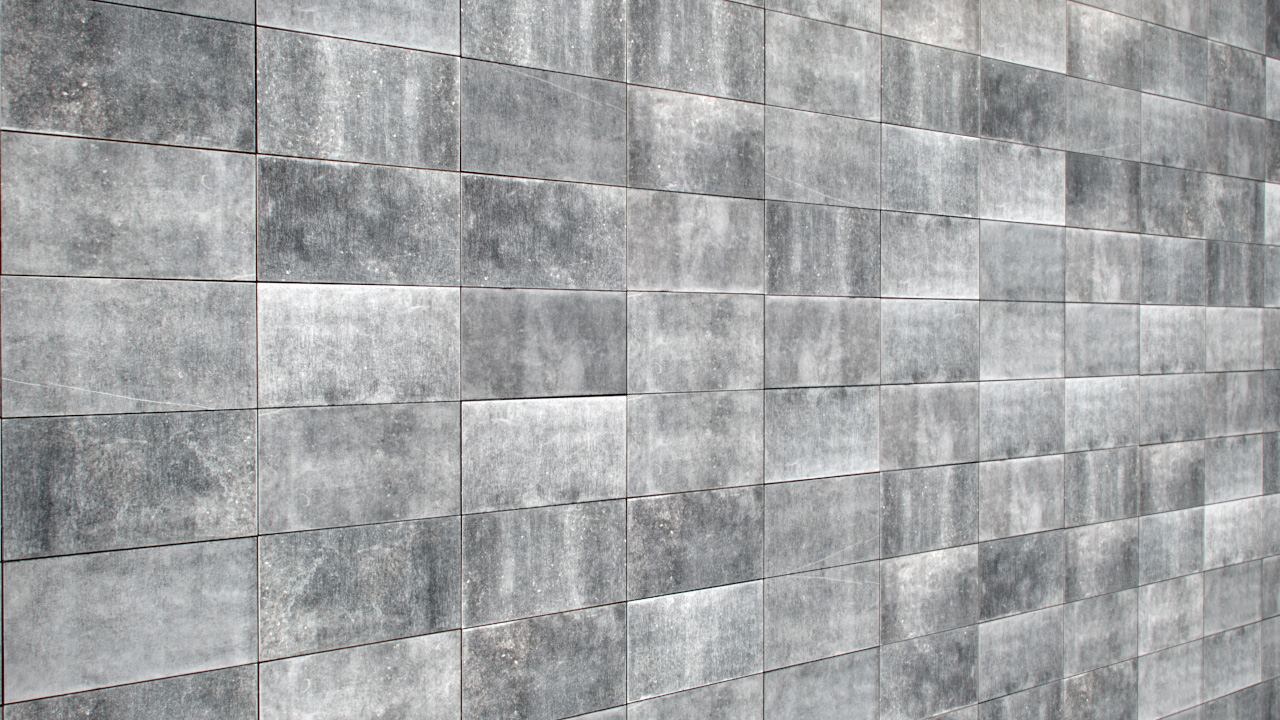
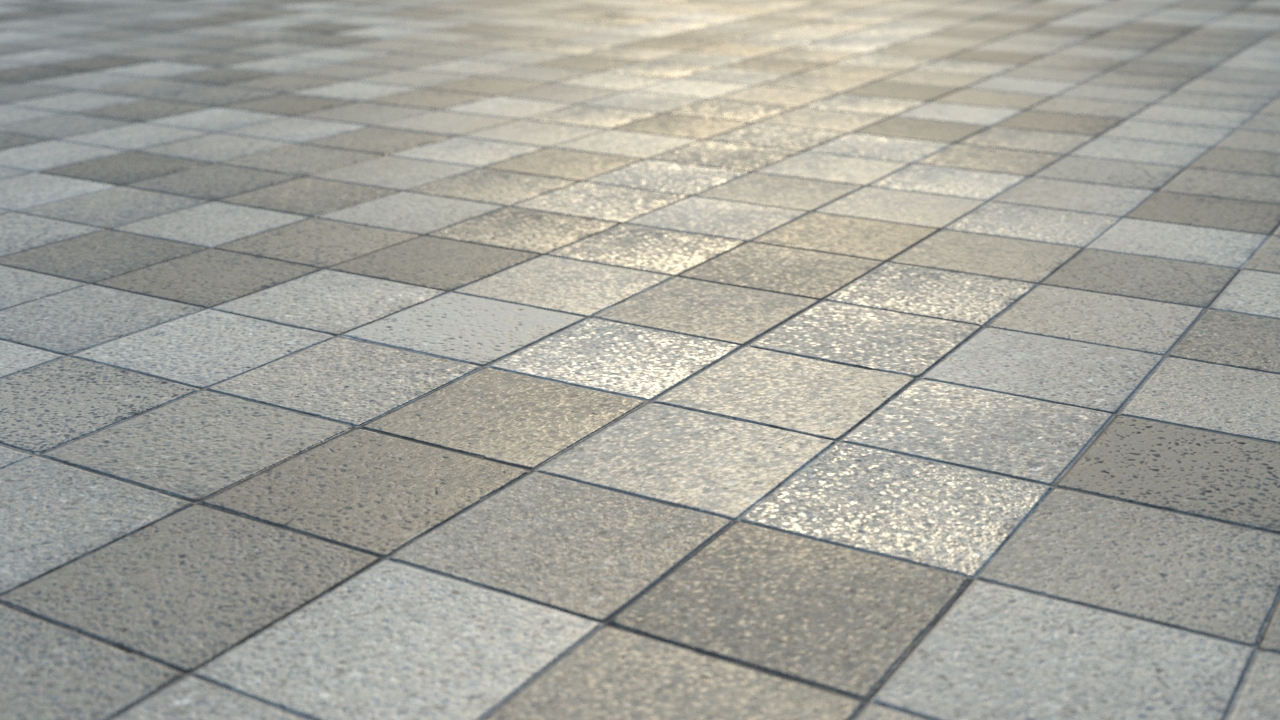
If you want to create a sidewalk like in the example above or square tiles for an interior bathroom wall or floor, you can use simple objects like a plane or box objects. In order to use the per Face distribution with Crossmap, you need to set the number and size of faces in the object properties correctly.
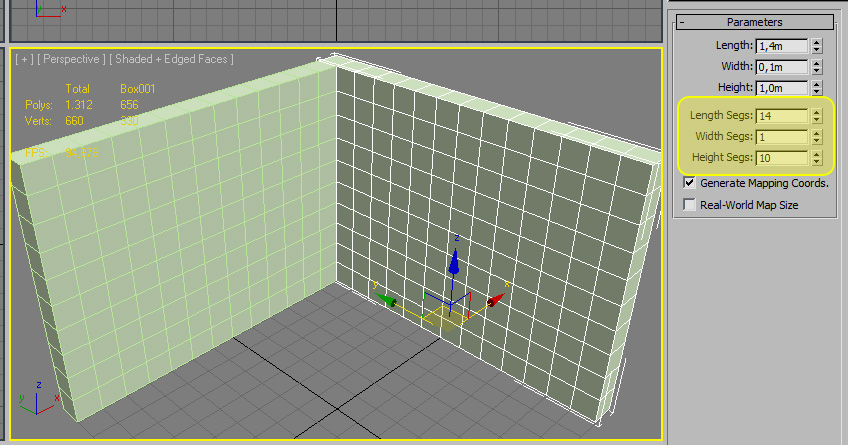
For the walls of an interior room you can use normal box objects and set the tiling related to the size of the wall. A wall with 2m x 4m that has 10 cm tiles should have a tiling of 20 x 40.
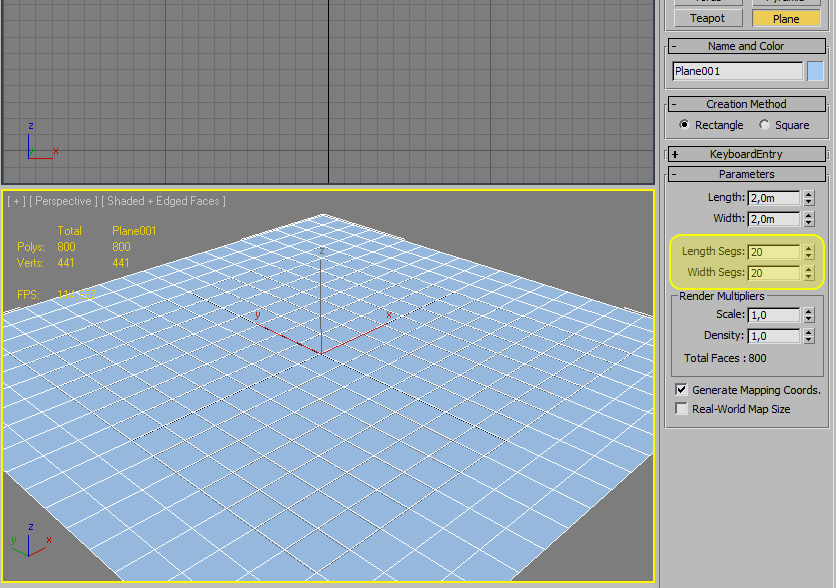
For a floor you can use a simple plane object and set the tiling according to the size of your tiles. A sidewalk with 10m x 2m that has 20 cm tiles should have a tiling of 100 x 20.
(2) Add Crossmap and load images
First you need to add Crossmap / XMAP to your material. You can use a standard, vray or mental ray material.
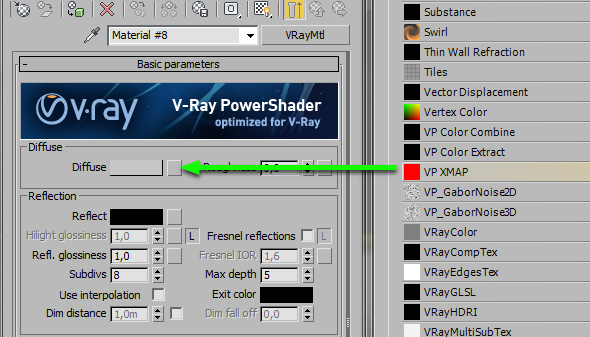
Insert XMAP to the diffuse channel of your material (vray, standard or mental ray material).
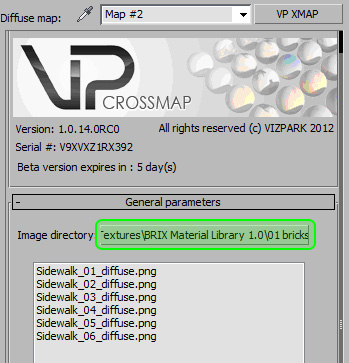
Now either select a Image Directory with bitmaps or add individual bitmaps with the Add File. You can later edit the bitmap list by deleting and adding specific images.
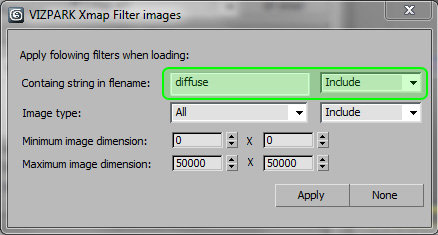
When selecting a folder with bitmaps, a Filter window will appear. This function can filter certain bitmaps from your folder, e.g. just include the diffuse bitmaps, or exclude all images with alpha channel.
(2) CROSSMAP setup for face distribution
Now, load multiple bitmaps into Crossmap, either by selecting a whole folder with bitmaps or by adding bitmaps individually, when they are stored in different locations.

Edit image list
Once you have images loaded into Crossmap, you can further edit the list. To get a preview of the images, just double click on the image names within the list. If you want to delete images, you can select (shift-select for a list, ctrl-select for separate selections) and hit the Delete button. You can also add images with the Add File button. Add File will open a standard file dialog in which you can select one or more bitmaps to add. Hold shift and select a list / ctrl and select for separate file selection.
Set random per FACE distribution
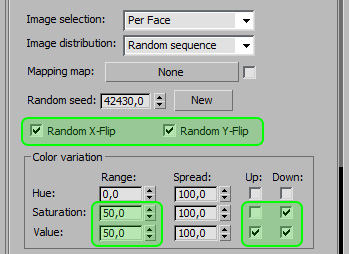
Now set Image selection to per Face. This will cause Crossmap to distribute and map the images to each face of an object. You can randomly distribute the images on faces with Image distribution set to Random Sequence or you can create patterns with the images in the list by choosing Linear Sequence.
Linear sequence
Random sequence

(3) Further randomization
Add random mirroring
Depending on your bitmaps, you might want to randomly mirror the bitmaps per face. Choose X-mirror and Y-mirror to randomly switch the bitmaps horizontally or vertically per Face.
Add color randomization
You can now randomize the color (hue, saturation, value) per face with the Color Variation parameters. The Range parameter sets the amount / strength of the color change. Setting this value to 100 will result in full range color randomization. You can select if you want to just increase or decrease the values by selecting UP and / or DOWN.
No color variation
Hue variation
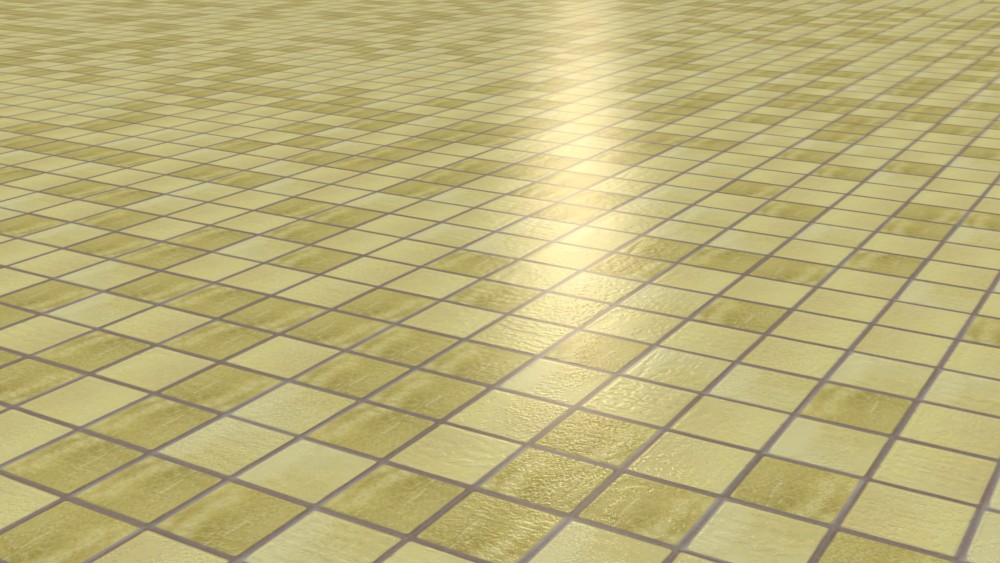
Sat. and Value variation
(4) Adding Bump, Reflection, displacement
If you have set up your material properly, you will now get some good results when rendering. But you probably want to add more realism with bump, displacement, andreflection to your material. This is where Crossmap has some strong features, because you can easily copy the map to other channels and then load bitmaps from a folder and filter specific bitmaps by name. So if your folder contains different bitmaps with endings like _diffuse, _bump, _reflection etc., you can just load the bump bitmaps or displacement bitmaps with a few clicks.
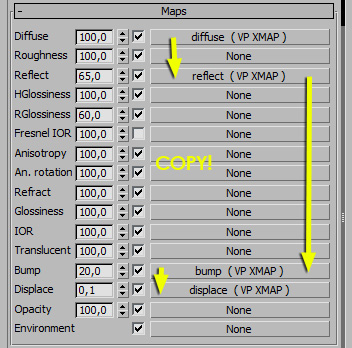
Copy Crossmap to other channels
In order to create the other channels with bump, displacement, reflection or others, just make a copy (not instance!) of Crossmap and paste it to the other channels. Creating a copy and not an instance is important, because each Crossmap instance needs different bitmaps that will be used for the specific channels.
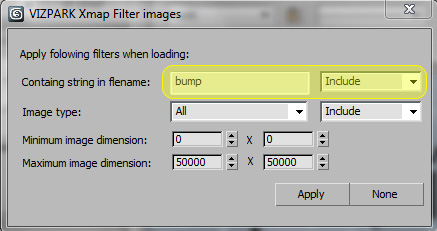
Load new bitmaps for bump, displacement etc.
After you copied the maps, go into each Crossmap and load new bitmaps for bump, reflection and displacement. You can easily filter bitmaps on load with the handy load-filter in Crossmap.
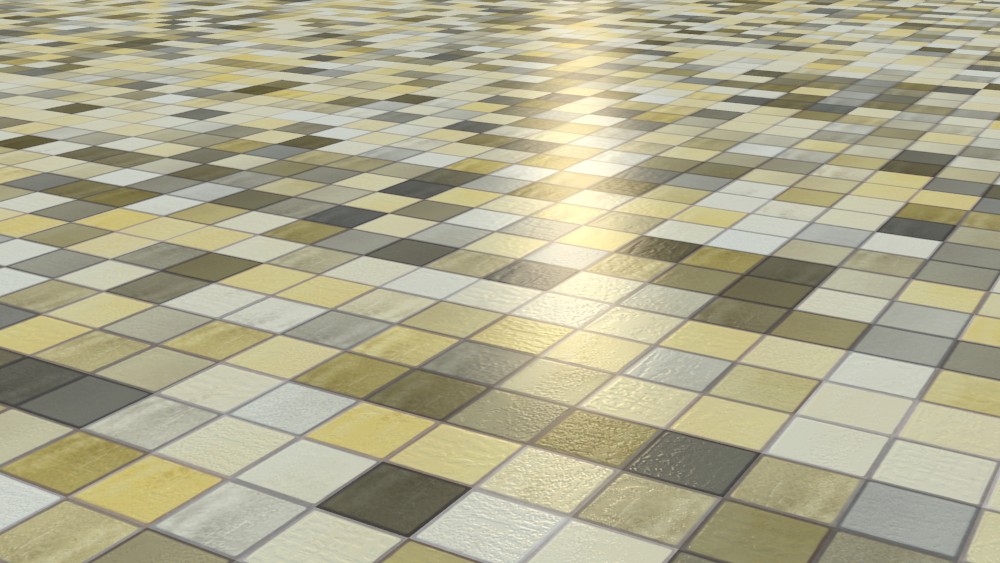
So, this is it. If nothing went wrong, you should get wonderful randomly tiled materials, with no repetition even in very large walls / floors and yet a very high resolution texture on close-ups.
Here are a few more examples:

how to download images , I didn’t understand how to do it ??? please explain
You can download the free sidewalk textures here: https://www.vizpark.com/shop/sidewalk-i/
and the free Lite Edition of Crossmap here: https://www.vizpark.com/shop/crossmap-le/
C4D tutorial please…!!!
…
Unfortunately VP Crossmap is just available for 3ds max and not Cinema4D, so a tutorial does not make much sense. Sorry…
I wondered if this works with Vray RT (GPU)?
Currently Crossmap is not compatible with VRay RT, unfortunately. RT uses a different shader than the normal 3ds max shader and they need to be developed specifically for RT. A workaround would be to render a map and use this in RT, then switch to Crossmap for final rendering.
How can I use it with my 3d model linked from Autocad to 3ds max ??
hi,
i’ve download crossmap Lite, and random won’t work ??
when i modify gamma, gamma apply evrywhere not randomly…
any idea ?
Hi Miaz,
Crossmap does color randomization with the parameters above, not with gamma. Gamma is the “global” gamma control. If you want to randomize the brightness, contrast or hue of the tiles, use the “color variation” parameters “hue”, “saturation” and “value” as described above in this tutorial point (3).
Best,
Martin