Tutorials
HDRI Lighting with Luxology modo
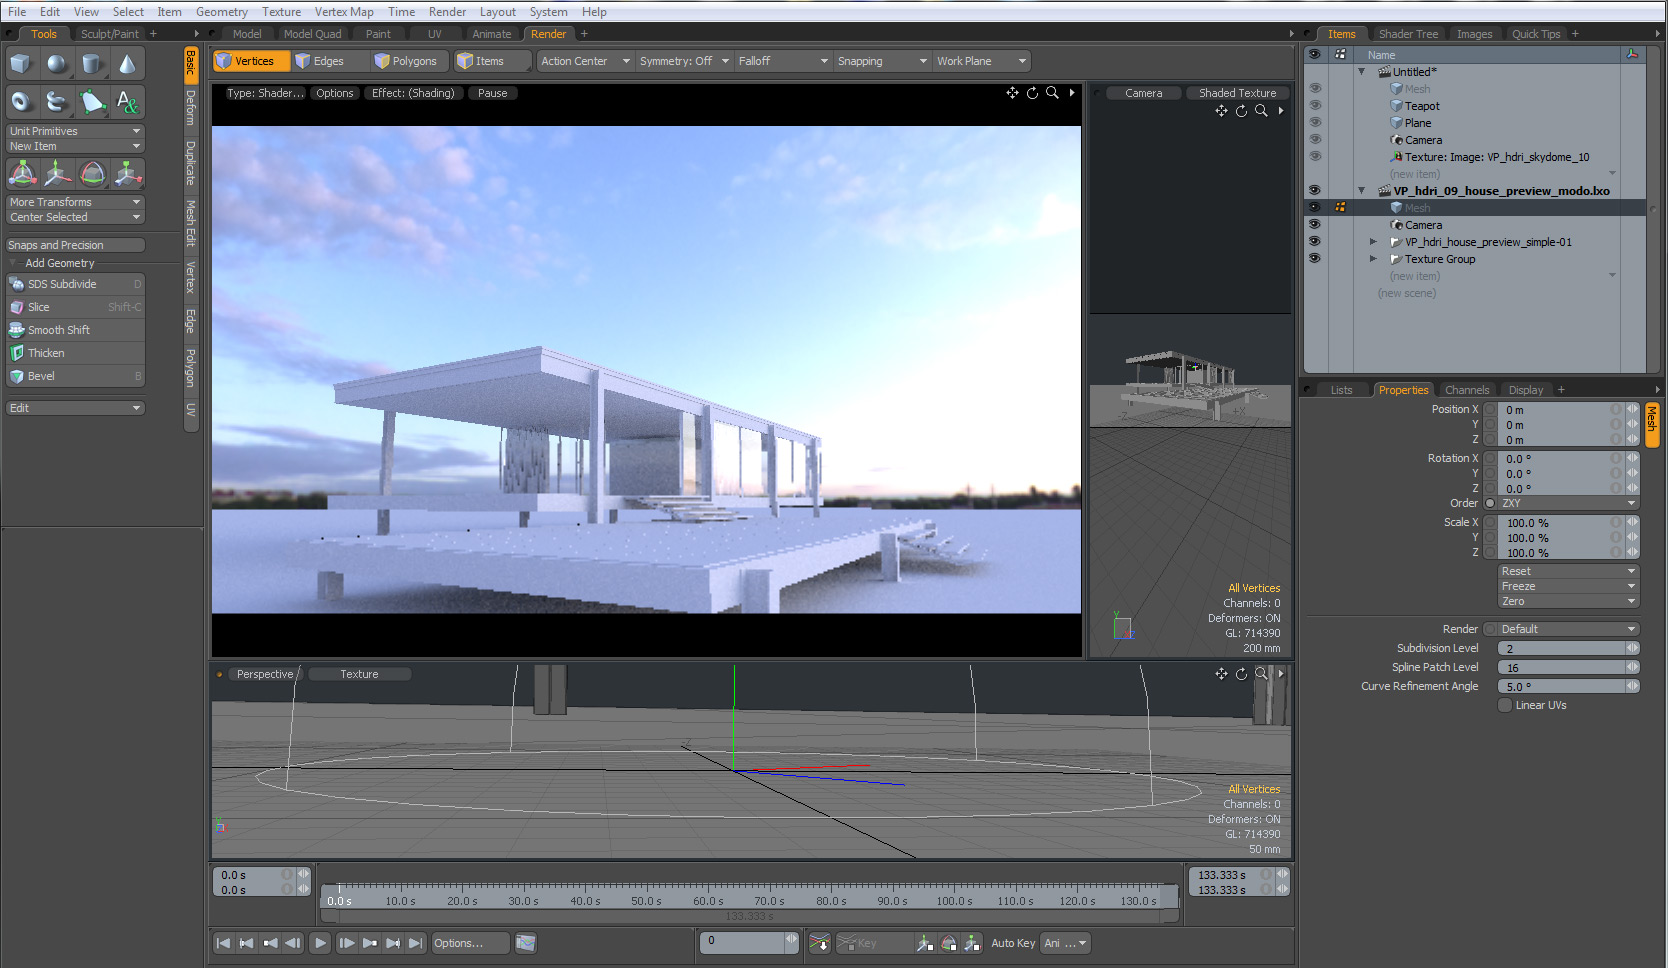
In this tutorial you can learn how you to set up and light a exterior scene with a HDRI Skydome inside of Luxology modo. While hdri lighting is not very complicated it´s necessary to know some details in order to get a good result.
The VP HDRI Skydomes have a very high dynamic range, which is best to create sharp sun shadows. Also they have an accurate white balance that will bring convincing and colorful lighting into your scene with a few clicks.
Basically you just need to follow 3 main steps: First to add a hdri map to the environment, then adjust the light parameters and third turn on the global illumination.
(1) Add an hdri texture to the environment map
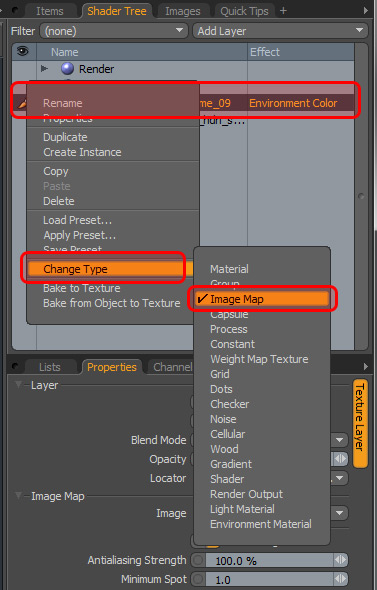
First you need to change the environment shader within the shader-tree to type image map so that the environment uses a texture for the lighting and background of the scene. Right-click on the environment map within the shader-tree and select Change Type > Image Map .
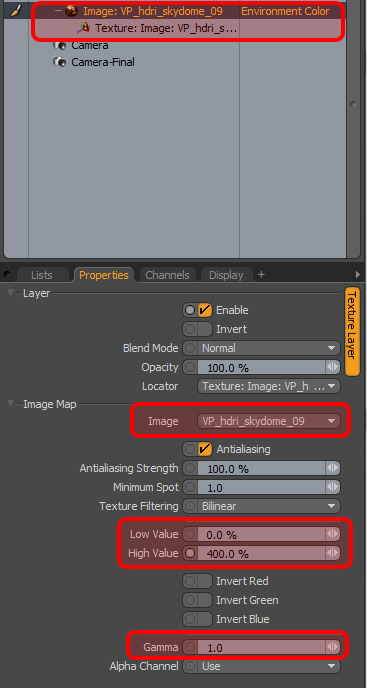
Click on the Image you just changed and go down to the texture settings. Load a HDRI file from the Image drop-down menu (load image). When the hdri is loaded (this may take a while depending on the size of your hdri), you can adjust the lighting with the Low Value, High Value and the Gamma below. Setting the High value higher than 100% will increase the light intensity (brighter light) while lowering it will cause less lighting (darker). You need to play around with these settings in order to get a good lighting setup. But first you need to change a few more parameters.
(2) Adjust the lighting and rotation of the sky
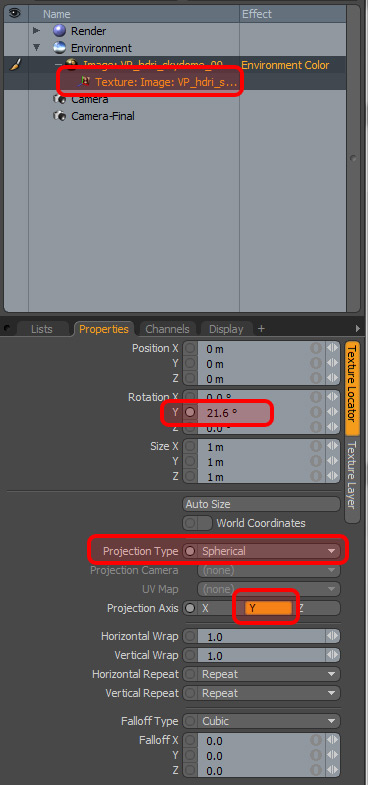
You need to make sure that the projection type of the image map is correct. Set it to Spherical so that it wraps around your scene like a ball and make sure that the projection axis is Y !. If you want to rotate your hdri skydome to adjust the sky and sunlight position, you can do so by changing the Y-rotation above.
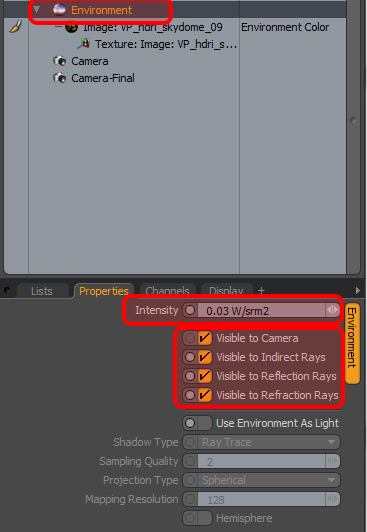
Your preview rendering will probably look to bright. This is where you need to adjust the overall intensity of the environment and how it casts light into the scene. Click on the Environment map within the shader-tree. Below in the parameters you will find a parameter Intensity that needs to be adjusted according to your light settings (HIGH VALUE) in the texture map itself. Change this parameter to something around 0.1 and 0.01.
Also make sure that the Visible settings are set to active, especially Visible to indirect rays.
(3) Adjust render settings and global illumination
Now that we have set up the lighting and hdri map properly we need to adjust the render settings. You might still see a black object in your scene, which may be the case, because global illumination is not turned on yet.
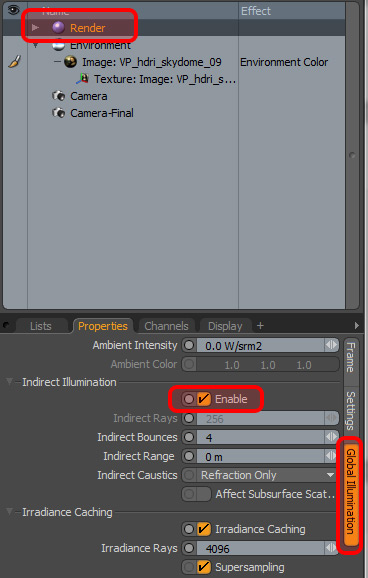
In the shader-tree click on Render and select the Global Illumination tab below. Check the Enable button and you should now see a proper scene that is illuminated with an hdri map.
You still might want to adjust the settings of the light to get a good result. In my experience, the gamma and High and Low values made the biggest difference in the appearance of the light and background. But see yourself…
All of the VP HDRI Skydomes include modo 302 scenes with proper light and render settings, so you can just go ahead and start rendering your own scene.


